From classrooms to boardrooms, PowerPoint slides are the go-to medium for sharing supporting content that helps audiences absorb and connect with the concepts and ideas shared in a presentation. we often walk away from speeches or presentations thinking about what we could do differently. While you can’t turn back the clock, there is another way to benefit from this reflection: watching recordings of your speeches or class video. Whenever possible, make sure you record your speeches or class video presentations. You can enhance your public speaking skills drastically by watching your PowerPoint screen recording and identifying ways to improve in areas that went poorly.
Part1: Steps to Record Presentations with DemoCreator Recorder
1. Launch DemoCreator
After opening the DemoCreator screen recorder for pc, from the main interface, click on the “Record” icon in the upper left corner of the screen as follows:
You can also opt for this option at the very start of the DemoCreator where you have got the options to opt for a Video editor or start a new recording.
2. Select Recording Inputs (Optional)
Now as you’re within the Wondershare DemoCreator Screen Recorder, within this DemoCreator Screen Recorder window, you can easily customize the recording screen for your customized recordings. Your computer screen, capturing your activity on the screen.

To proceed with that, refer to the recording window where you can then set the screen size for your recording, enable the Screen Drawing Tool; where you can easily draw on your screen while recording, and you can also do the recording of your System sound or Microphone sound or webcam recording as shown in the above figure.
3. Open PowerPoint
If you want to record your presentation from the PowerPoint, then simply open your slides with the PowerPoint. For that, you need to directly open your PowerPoint application from the Start menu and be with it.
4. Start Recording
As soon as you’re done with the customization of your recording screen and after you’ve made ready your recording screen with the DemoCreator application in the background, you can directly start the recording by hitting the “Recording” button which is a red-circle button situated within the screen recorder.
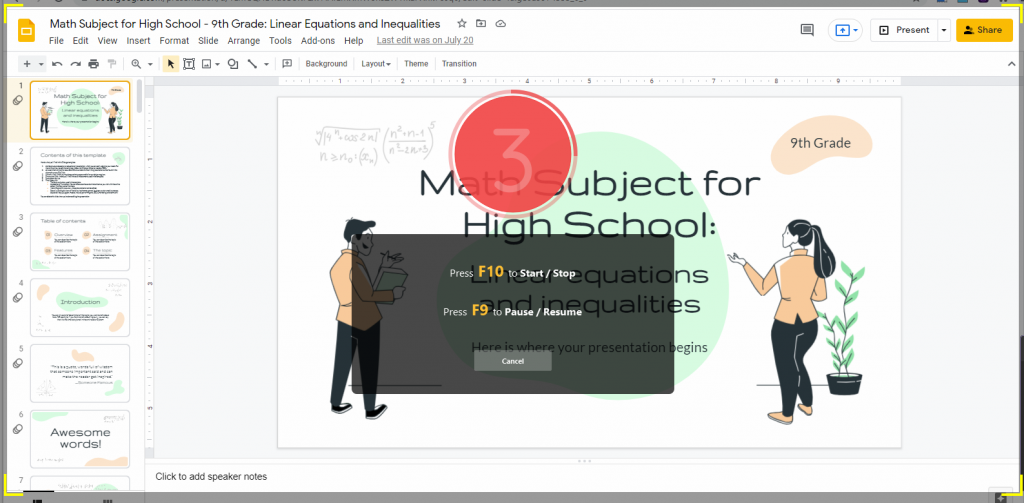
5. Start the Slide Show in PowerPoint
Right after you’ve started recording, start the slideshow in your PowerPoint application where you’ve opened up your slides to get recorded with DemoCreator.
6. Finish Recording
As soon as you’ve reached the ending slide of your PowerPoint slideshow, open the DemoCreator recorder and hit the Stop button which is visible to finish your recording instantly.
Part2: Utilize DemoCreator Video Editor
Wondershare DemoCreator is also packed with a powerful video editor which has an imposing business model in the video editing industry. From the video catching to the video altering, this product from Wondershare is the main source of pro-level and significant editing features you would require in your video project as per your expectations. Planned explicitly for the recordings, this product thinks of a streamlined interface to take your recordings to the next level through its professional editing features.
About Wondershare DemoCreator Editor, it’s viable with modest frameworks, its video editor has a lot of implicit tools to be utilized in the video projects. We have highlighted some of them below. You can also extend the editing formation to the advanced level with this software. Just follow the steps below to perform various pro-level editing:
Open Video Editor
In the first step to proceed with the editing functionality, you need to enable the video editor of Wondershare DemoCreator, as soon as the screen recording is finished, hit the “F10” button on your keyboard that will stop recording and will take you into the video editor as stated below:
Here in the video editor, you can see your recording file that will be displayed in the media section of the editor automatically as follow:
Drag to the Timeline
To start editing your recorded file, you need to drag and drop your video file into the timeline of this video editor.
Perform Basic Editing
Now in the timeline, to pop up the basic video editor, all you need to do is just select the video file within the timeline and you can see the video editor at the right corner of the screen as follows:
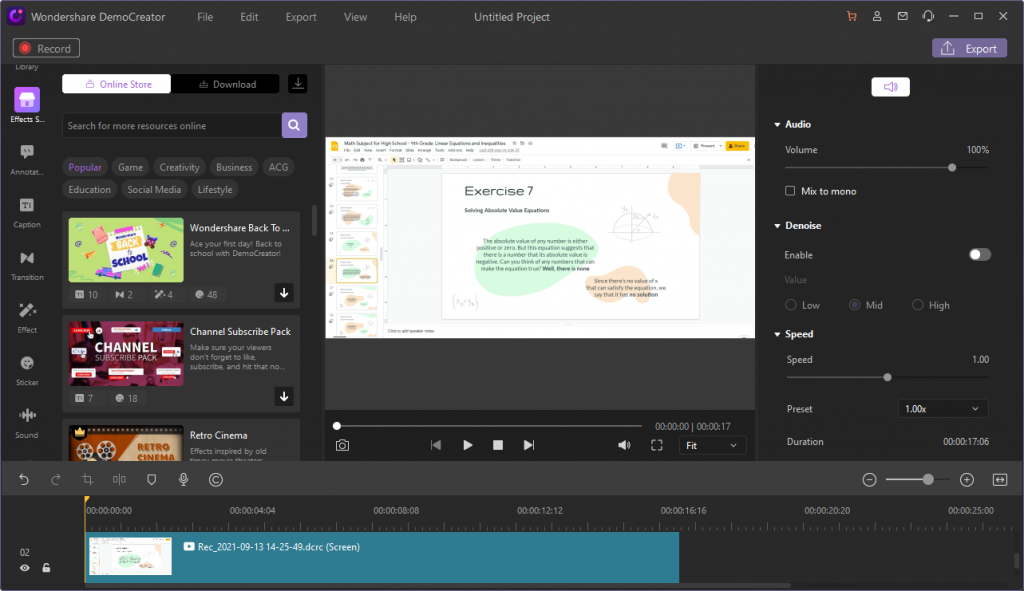
Here you can perform various actions such as cutting unwanted parts from the screen recording, change the speed of your recordings, and other compositions.
Perform Classic Editing
You can also opt for the opposite vertical menu bar where you can easily add openers to your videos, add text and animated titles, add transitions, or add background music as well.
After you are done with the basic video editing functionalities, you can preview your video within the preview window of DemoCreator to see if you’ve missed anything about your desired video project.
Part3: Some Advanced-Level Editing
1. Add Your Annotation
You can bring various annotations to your videos by going into the Annotations menu of the software interface.
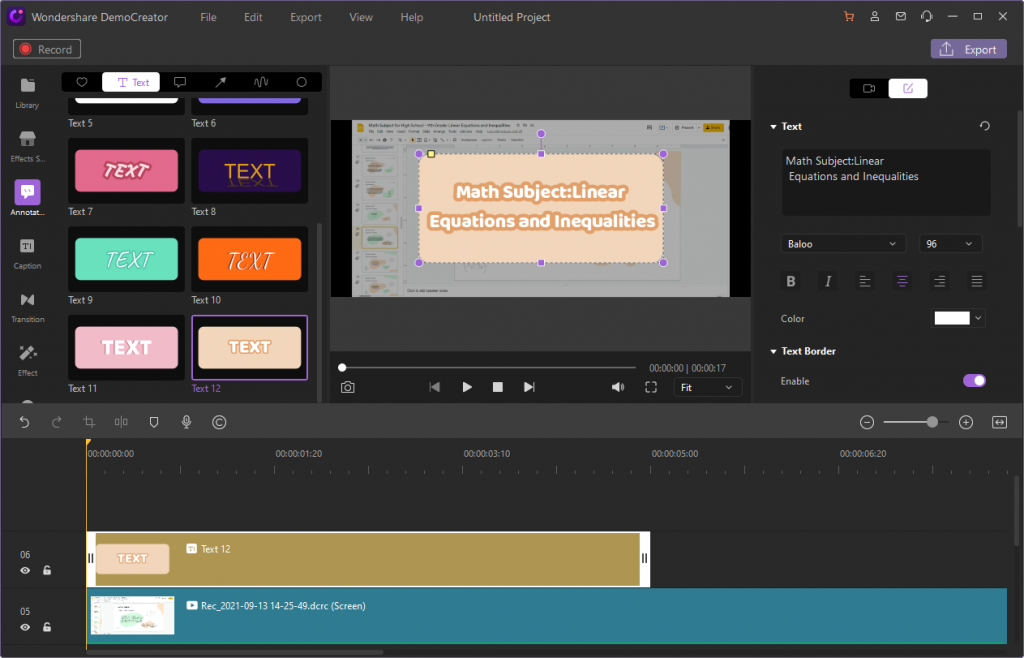
2. Add Your Stickers
You can also bring stickers to your video just after hitting the Stickers menu from the same menu bar as follows:
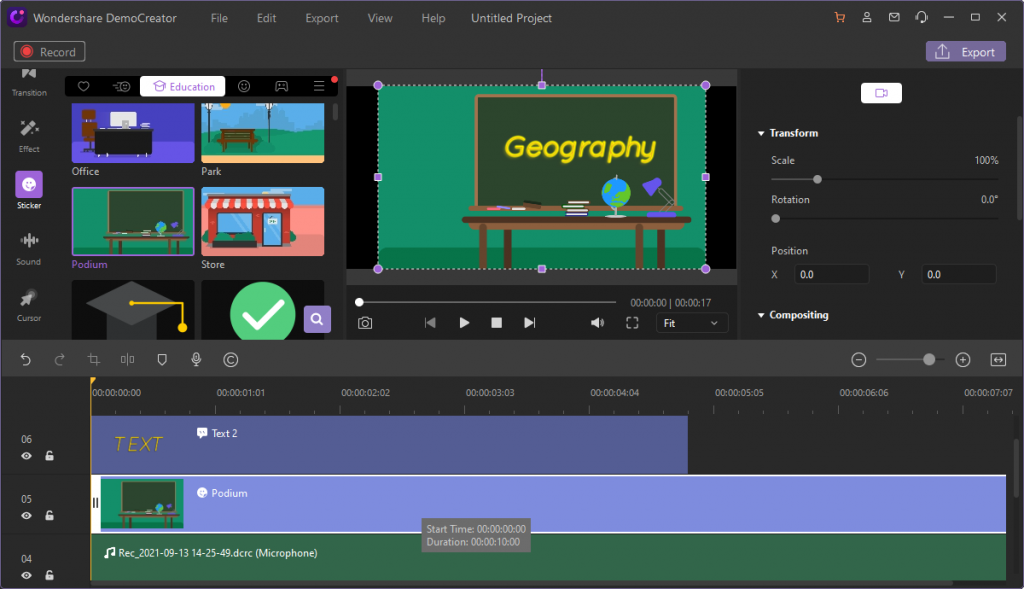
3. Add Motion Effects
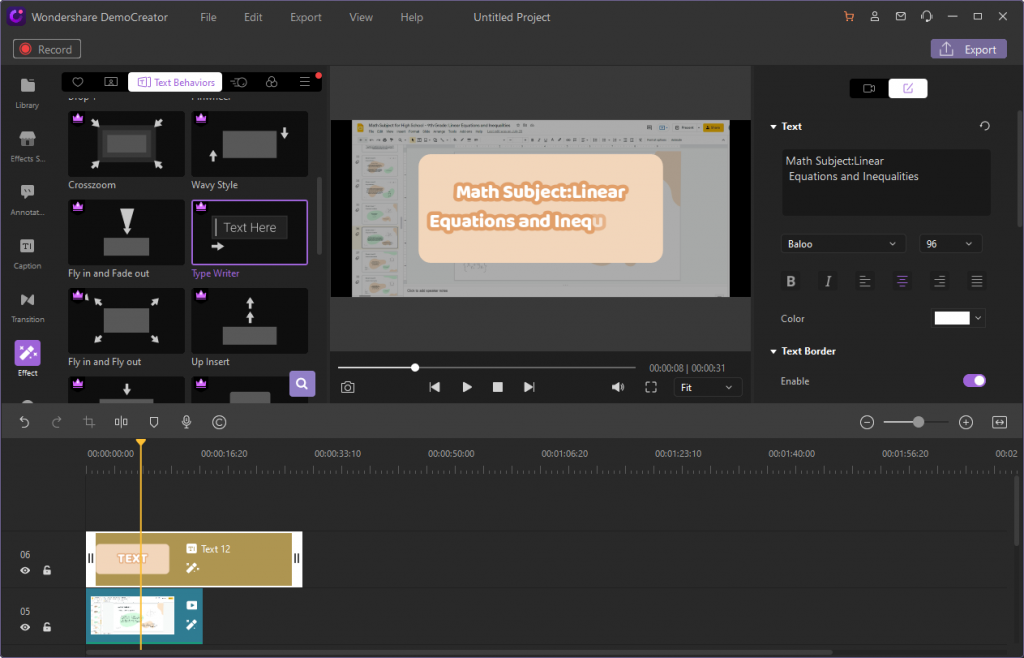
Effects are what makes your content the standing out from the other variety of content available, hence to bring the outstanding effects into your video, you can refer to the Effects menu of this software as follow and to add transitions to make your video content engaging, go straight towards the Transitions menu of this software.
4. Add Voiceover To Your Videos
You might need a music file to match your video intro standing out needs. To do so, add the music file to the timeline. You can also use the editing tools available on the right side to further enhance the music file added within the timeline with the video clip.
Wondershare DemoCreator allows you to edit your music file separately with a built-in audio editing tool available at the right side of your screen. You can also add voiceover as the completeness of the video presentation.
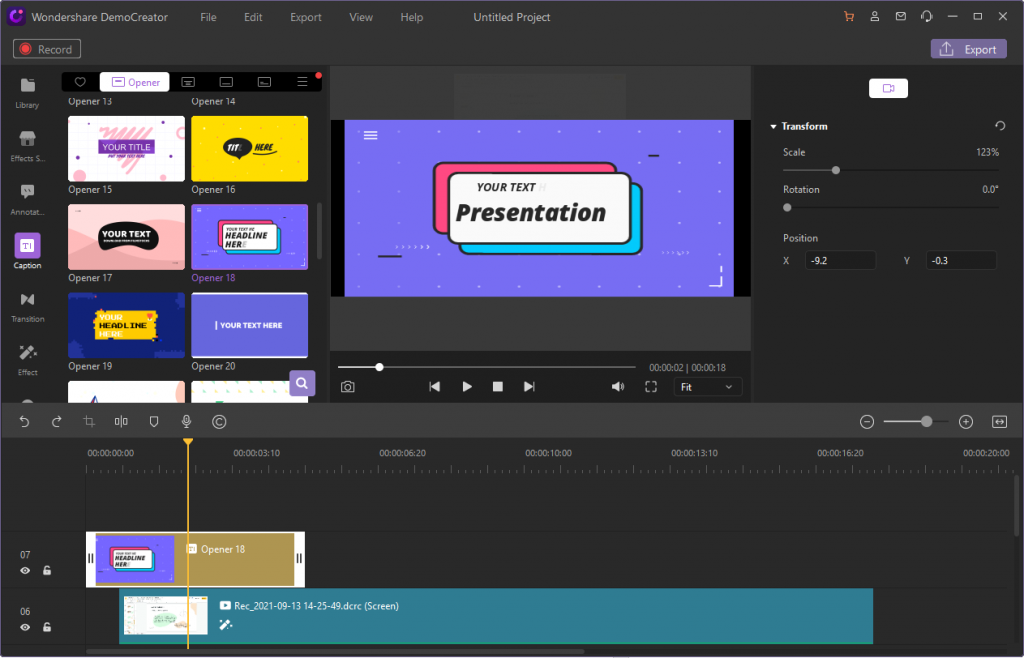
5. Add Titles and Captions
You can add titles to your video just by clicking at the title menu bar situated at the left corner of your software interface as follow:
6. Add Facial Recognize, Mask, Mirror, Or Other Effects
You can also introduce the masking effect to your videos if you’ve recorded a tutorial or how-to video, hence to do that, go straight towards the Effects menu at the left corner of the screen and select your favorite effects including facial recognized Masking effect, Mirror effects, Pan and Zoom and much more handily.
Part4: Save and Upload Your Recording
Wondershare DemoCreator allows you to record your favorite slideshows to video content to the world right from the comfort of this software. You can save directly to your computer with the Export menu as shown below:
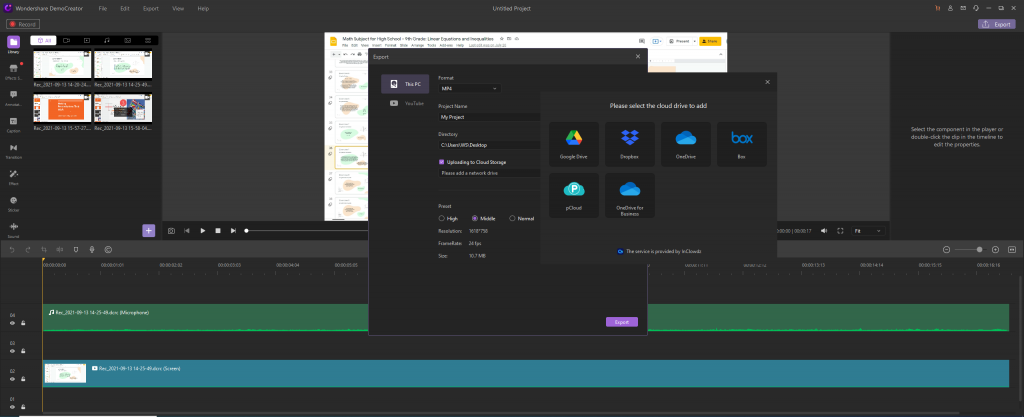
Additionally, you can also share your video content to some renowned online platforms directly just as you’re done with the recording features. Right from the Export menu, you can share it to YouTube just by clicking on the YouTube menu bar at the left corner of this Export window as follow:
To proceed with that. all you need to do to share it on YouTube is sign in to your YouTube channel account and share it with the audience directly.
Now the best part with the Wondershare DemoCreator is that you can export it to various formats of your own choice as you’ve plenty of options available at the exporting window of this software. This is a great way to create a permanent record of your oral presentations. You can also create lessons to augment a course you are teaching or record class lectures for students to review as many times as they wish. There are lots of possibilities.
Virtually anything that you can show on your computer screen can be captured this way and published as a video. As soon as you’re done with the editing process of your masterpiece, now is the time to show it to the audience. You can do that with this software easily and handily. So, to proceed towards the exporting options, you can hit the Export button at the top right corner of the screen as shown above.


